
More Guest Blogs


Editor’s note: This post is one of a series by Eric Whetzel about the design and construction of his house in Palatine, Illinois, a suburb of Chicago. A list of Eric’s previous posts appears below. For more details and more photos, see Eric’s blog, Kimchi & Kraut.
In our previous home we had decided not to use any carpet. Not only did we prefer the look of tile (for wet areas) and hardwood (living areas and bedrooms), but we also knew these surfaces would be easier to keep clean. Although I grew up in two homes that both had mostly wall-to-wall carpeting, it was only after having to rip up several rooms of carpet that I realized just how much dirt and general detritus gets trapped below the surface.
There does seem to be an element of generational change (some would argue even social class) involved in this choice between carpet and hardwood. For example, my parents, who grew up on farms in the 1940s without carpet, were shocked that we preferred hardwood flooring. Having wall-to-wall carpeting was a big deal for them when they moved to Chicago in the late 1950s. To them, hardwood flooring signified the outdated past while carpeting was the future.
Having lived with both, I don’t think I’d ever choose to go back to carpet. In addition to being much more interesting visually, hardwood flooring is easier to keep clean and much easier to fix or repair should damage occur.
Which species of wood?
At our last house we went with prefinished 3/4-in. by 5 1/4-in. Australian cypress. Even though we loved the look of the cypress, it was more expensive than other species and it seemed to dent more easily than its Janka hardness score would suggest.
Oak is, by far, the most popular wood species for flooring, seen in countless stain-color variations, but we wanted to try something with more natural color variation from one board to another.
For our new home, we knew we still wanted to go with only hardwood and tile, even though there are now more eco-friendly and sustainable carpet options. We also knew we’d have to utilize a low- or no-VOC finish for the wood flooring in order to maintain a high level of indoor-air quality.
Also, since we went with a prefinished hardwood last time, this time we decided to try a traditional install, meaning the flooring would be sanded and finished in place.
The only real gripe we had with the prefinished flooring in our last house was the beveled edge between boards, which created grooves that trap dirt. Also, we felt it was slightly less appealing visually than a traditionally finished floor. Nevertheless, we would consider prefinished flooring to be a viable option, especially when working under severe time constraints and you need a room or whole house completed quickly.
Hickory is the choice
After considering various wood species, we settled on hickory since it can look similar to Australian cypress. Its Janka hardness score is slightly higher, promising some added durability. It’s also harvested and shipped from within the U.S., so it cuts down on shipping costs and total embodied carbon emissions.
Looking around locally, including at our local flooring retailer, I could only find manufacturers who packaged their flooring in boxes of shorter boards (the longest boards typically in the 4-ft. to 7-ft. range). Using shorter boards tends to produce a choppy look, reminiscent of a brick running-bond pattern.
The options seemed much better online, although shipping costs had to be factored in. It also was difficult to find the color variation we were after since much of the hickory that’s available would be classified as “clear” or “select” (NWFA). In the end, we used CountryPlank.com, ordering the Old Growth Hickory in random lengths (2 ft. to 10 ft.).
Of course when the flooring was being delivered it turned out to be one of the coldest days of the year with plenty of snow around. Thankfully, with the guys helping us, it went pretty quick.
Installation
Before installing the cypress in my last house, I consulted a book from Don Bollinger as a helpful how-to guide. The book came with a video companion, which I’ve since lost, but much of the footage has shown up on YouTube. Among the offerings is this one:
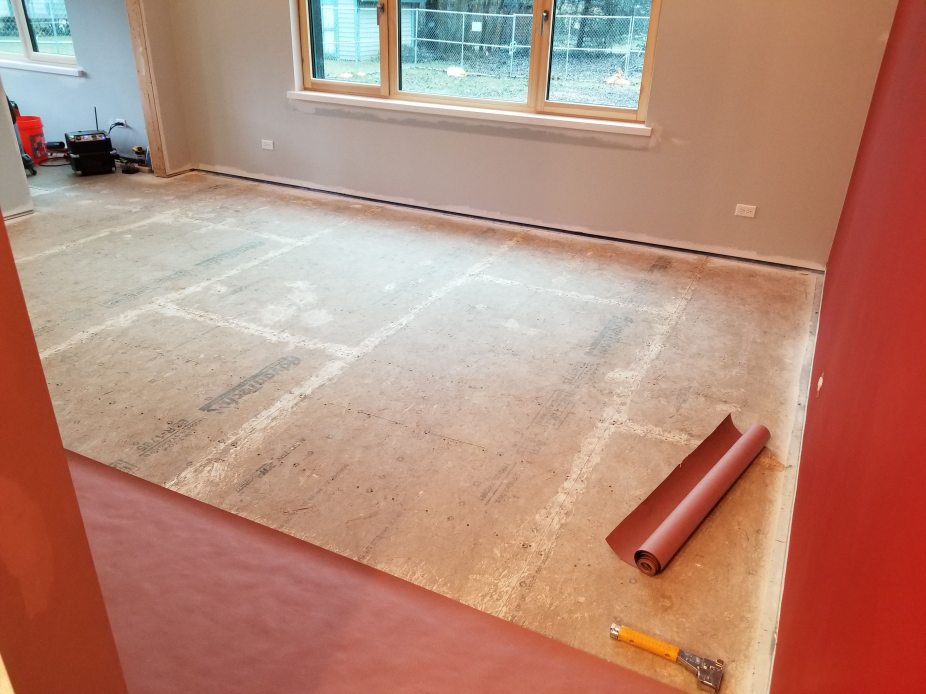
After clearing a room of tools and other construction-related items, I set to work prepping the AdvanTech subfloor.
Although the AdvanTech is said to resist moisture better than other OSB or plywood subflooring, because of delays in construction the sheets of AdvanTech saw more exposure from the weather than is ideal.
Nevertheless, apart from having to grind and sand down some edges that had expanded due to moisture, the AdvanTech held up incredibly well. In addition, since the framers used nails to fasten it to the floor joists, I went through each room adding decking screws to help stiffen the floor even more.
Once this was done, I was able to put down some red rosin paper. In my last house, I used 15-lb. roofing felt, but since it’s saturated with asphalt, I decided for the sake of indoor-air quality that the red rosin paper was the better option. Rather than using it to control moisture, it’s mainly helpful in keeping a neater workspace as the flooring goes down.
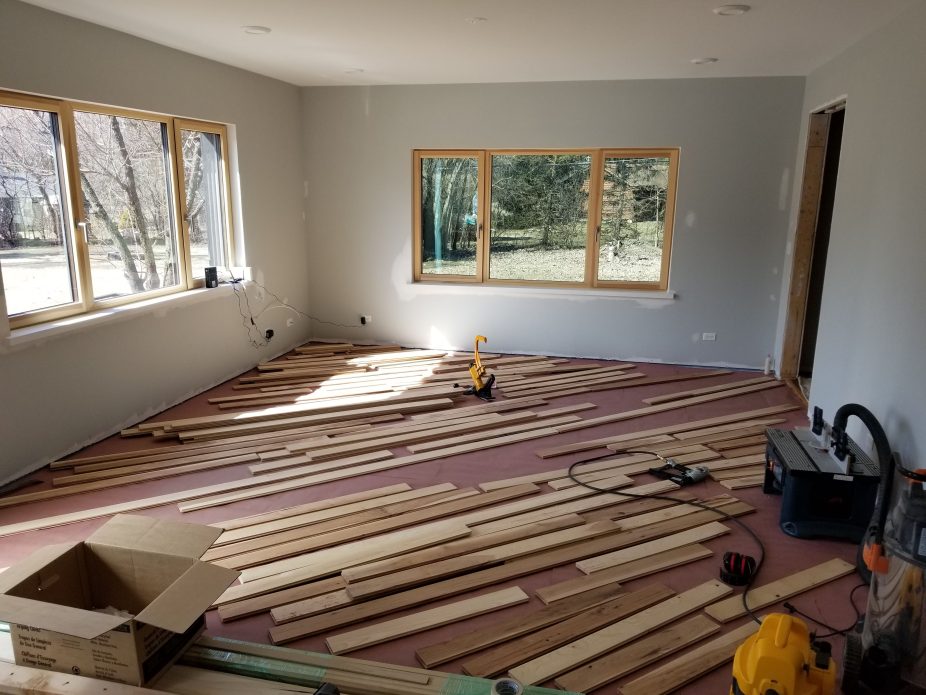
With all of the red rosin paper down, it was time to bring in the tools and to start arranging piles of wood flooring based on length and color. As I unwrapped each pile of boards, I went looking for the longest and darkest, making sure to have them nearby. I tried to use the longest boards first, and then be selective about how to place the darkest and most attractive pieces. When all the rooms were complete, I wanted the leftovers to be mostly shorter and lighter-colored pieces.
The only other major decision before beginning to install the flooring was how to orient the pieces. Most homes use the longest wall in a space as a guide, installing the wood parallel to this wall. Ideally, this would also mean the flooring runs straight from the front door entry area to the back of the house in bowling-alley fashion. This assumes the floor joists are perpendicular to the direction of the wood flooring. We decided to install the flooring diagonally, as we had in our previous home. The only significant downside to the diagonal pattern is that additional cuts are necessary, so more wood is required.
Using spline pieces was helpful when making a change of direction, or establishing the border where the hardwood flooring met the tile in the kitchen, utility room, entry, and bathrooms. I would cut off the tongue side of the board on a tablesaw and add grooves to both the end of the board and the wood border piece with a router. The splines made for a tight, durable connection.
The diagonal pattern also means that the flooring nailer ran out of room before I got to the wall. For these last few inches I used a trim nailer, shooting nails into the tongue and face-nailing a couple of nails at the outside edge. Even though these nails are significantly weaker than the flooring nails, we haven’t seen any gaps or other issues at the perimeter of our walls. This may be because we don’t see wide swings in the levels of indoor humidity (typically, the house stays within 30% to 55% relative humidity, most of the year hovering around 40%).
It probably also explains the lack of floor squeaks. When there are wide swings in outdoor humidity we sometimes get a couple of pops from the wood flooring itself, but we’ve never had an issue with the floor joists/AdvanTech connection squeaking. In our last home, a conventionally built tract home, similar changes in humidity made our wood floors sound like they were in a 100-year-old farmhouse, popping with almost every step until the humidity and the wood had a chance to stabilize.
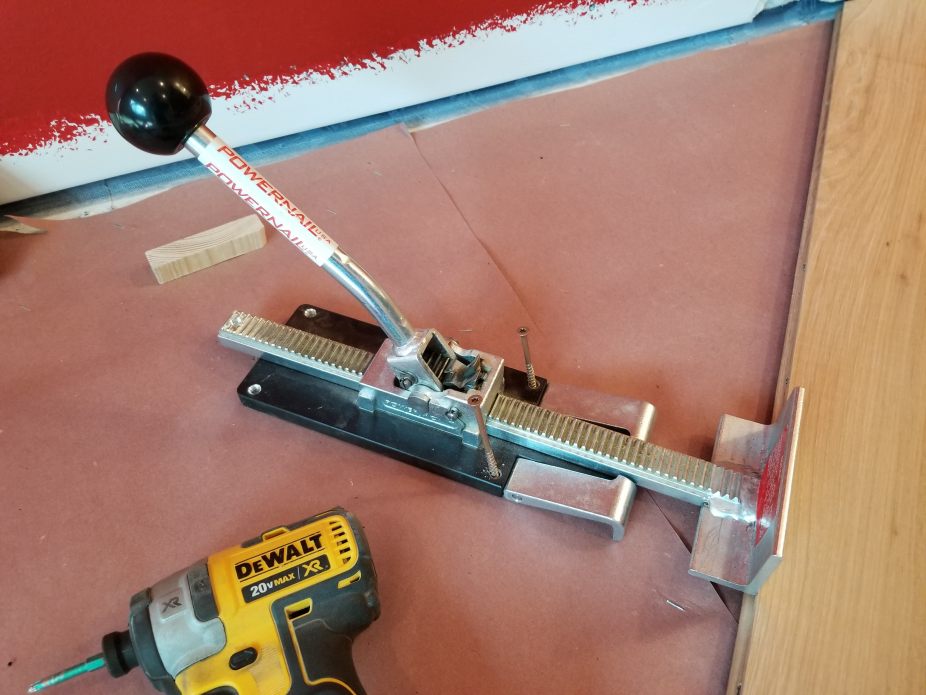
One of the best tool purchases for the entire build was a Powernail “persuader” (see the photo below). Whether at walls, or out in the field, this tool works exceptionally well at straightening boards and closing unsightly gaps that would otherwise need to be filled with wood filler.
Before sanding, I applied wood filler to all of the nail holes, any voids in the many knots, and to any remaining gaps between boards (mostly where the ends butt together). For the deepest voids in the knots I made two passes with the filler, sanding in between coats. In the end this produced a much smoother finish.
I found the Timbermate brand online, and was pleasantly surprised at how easy it was to work with and how well it’s performed over time. I started out with half a dozen different colors, but eventually narrowed this down to just two: Beech/Pine and Chestnut. In effect, these two colors spanned the wide variation in color from light to darker boards.
Although it claims to be zero VOC, Timbermate does have a distinct and slightly funky smell as it comes out of the jar. This odor completely disappeared once it was sanded down and the floors were sealed with tung oil. Timbermate also is very easy to sand smooth.
Sanding the floors
Thankfully, the flooring didn’t require a lot of sanding. I could have rented a traditional floor sander and edger, but after reading about Festool’s orbital sander and then a similar sander from Bosch, I decided to try the Bosch and see what it could do. I started in a smaller room, my daughter’s bedroom, just to see how long it would take. Starting with 40-grit for the worst areas, I slowly worked my way through increasingly finer grits, ending at 150 for a smooth finish ready for tung oil.
Since I was able to work through the various grits in just over an hour, I decided to keep using the Bosch sander for the rest of the floors. Again, if I was sanding conventional oak strip flooring purchased from a big box store, I definitely would’ve rented the normal sander/edger combo.

Just before starting the wood floors my Fein shop vacuum died. I picked up a Ridgid brand vacuum from Home Depot mainly because it was the quickest option, fully expecting to be disappointed by its performance. To my surprise, it worked even better than the Fein vacuum and at a much lower price.
Finishing the floors with tung oil
Once the floors had been sanded down, it was finally time to start finishing with tung oil. Before we started applying it we made sure to tape edges where wood met tile, mainly to keep cleanup to a minimum but to also protect the grout from being darkened by the tung oil.
Real Milk Paint, the company I purchased the tung oil from, has an excellent how-to video on doing wood floors:
We used close to a 50/50 mix of tung oil and citrus solvent, with just slightly more citrus solvent added to encourage deeper penetration of the tung oil.
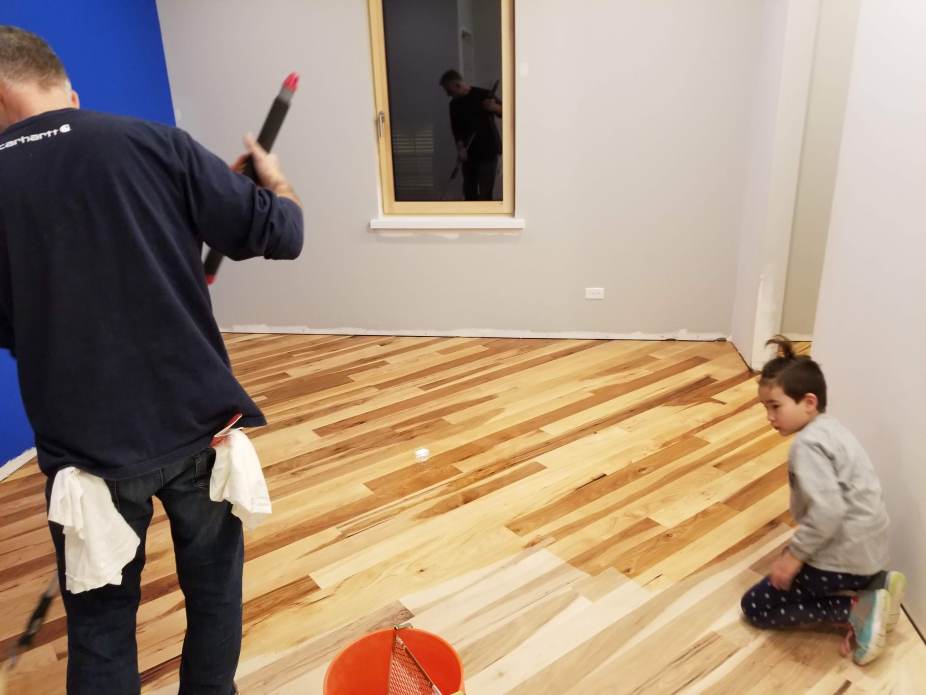
My helpers enjoyed doing the first coat with me in each room because there was such a dramatic color change as the tung oil initially went down. The tung oil really makes the grain and all the color variation in the wood really come to life.
First, we brushed in from the perimeter edges several inches, before rolling the rest of the floor with a lambswool roller connected to a paint stick. We were careful not to get too far ahead of the roller to avoid “flashing” that could show up where these areas meet up once the floor was completely dry.
It was always exciting to watch this dramatic transition from light and dusty to amber, dark, and stunning. Once the floor had a full coat of tung oil applied, we would wait about 45 minutes before looking for areas where the oil had completely soaked in. This was especially pronounced around knots.
After waiting an additional 45 minutes, we hit these dry spots again. Once another 45 minutes were up we wiped down the floors with cotton rags, available in 20-pound boxes from a local paint store.
Typically the floors were completely dry within 24 hours, but sometimes we waited one more day before repeating the same process a second and final time. After two separate days of applying the tung oil in this way, the floor was finally finished and I was ready to move on to the next room.
It does take quite a few rags to wipe the floors down properly. It’s also worth noting that we were extremely careful to dispose of the oil-soaked rags carefully in order to avoid a fire. That’s a more common occurrence than most people realize.
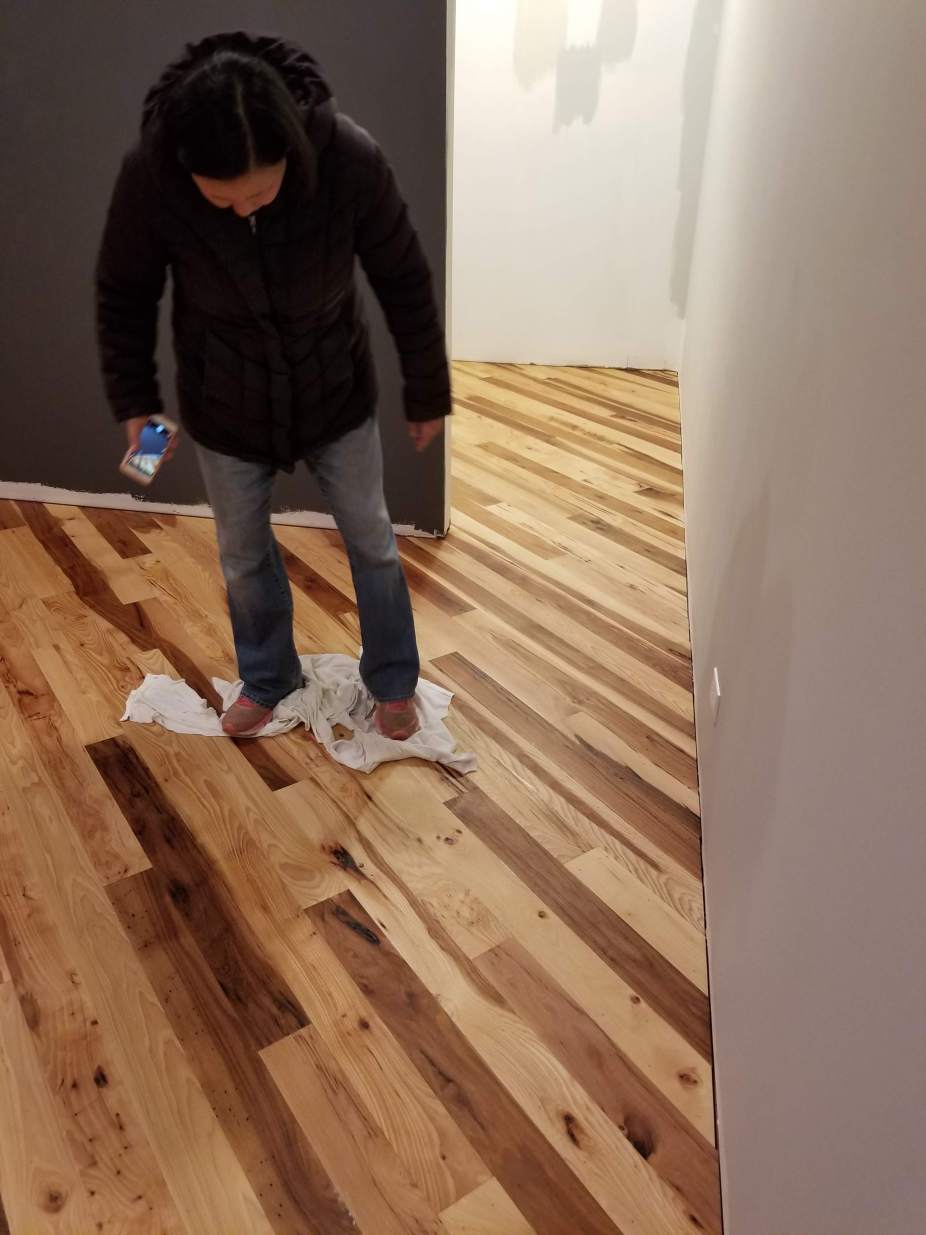
In fact, when we thought we were done wiping, we’d go back one last time, walking the floor with rags under our shoes to get the last bit of tung oil that was inevitably still oozing up out of the hickory.
It was exciting to see the transformation from unfinished to very rich looking as the colors in the wood popped after the application of the tung oil.
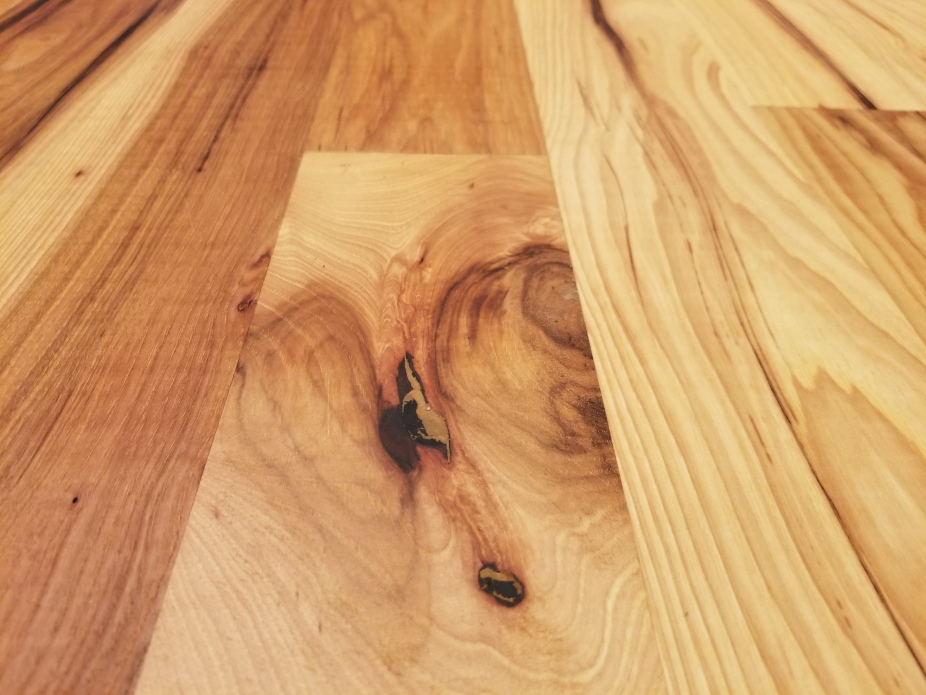
We really love the color variation from one board to another. The range of colors and textures in the grain is stunningly beautiful. Visually the floors run the gamut with what looks like pine, walnut, tropical hardwood, oak, maple, bird’s eye maple, some boards with insect damage and staining, and, of course, clear hickory. This wide variety of colors and textures celebrates the full breadth of what the wood has to offer (as opposed to just clear grade), and it nicely adds to our overall Urban Rustic and wabi sabi design aesthetic for the house.
The orientation of the flooring is in the main direction of foot traffic so that it feels like you’re almost always moving with the pattern in the floor rather than against it. In order to maintain this feeling throughout the house, it required changing direction in a couple of areas. In these areas I used a transition piece in the door jamb of each bedroom to mark the change in direction.
When the flooring changes direction it makes for a dramatic visual accent as the contrasting angles meet up. Below is the same area shown above, now with the family room flooring installed (but unfinished) next to the tung oiled master bedroom flooring:
Living with oil-finished flooring
The tung oil finish is definitely softer and more prone to damage when it is first put down than a floor covered in a clear coat would be. After move-in day I definitely noticed some scuff marks but no major damage. Since then, the tung oil finish has been holding up well.
Granted, we take our shoes off when entering the house, which definitely helps to keep dust and dirt under control, particularly the grit that can scratch wood floors. It also helps that we keep all food and drink in the kitchen.
There’s only been a couple of times that a significant scratch or dent required getting out the Timbermate wood filler, the orbital sander, and the tung oil. In these cases, it was much easier to repair these relatively small spots than it would have been with a clear coat.
Overall, the main advantage a natural oil finish has over any clear coat is the amount of texture in the wood grain that’s allowed to come through (especially when viewed on an angle), combined with a matte finish, so the wood tends to look warm and natural.
Nevertheless, I don’t think I would use an oil finish if we had a large dog, or if we preferred to keep our shoes on all the time. Under those circumstances, I’m guessing you’d have to commit to an annual spot sanding and tung oil application, at least in high traffic areas, to keep up with the damage.
Whether using a natural oil finish, or a more common clear coat, it’s worth exploring the options, including coming up with a few sample boards just to make sure you’ll be happy with the final look. A website like Green Building Supply is especially helpful in this regard, as they offer several brands of each kind of finish in low- or no-VOC products.
It’s also worth noting that the initial wide contrast between the lightest and darkest boards has mellowed over time, so although the contrast is still evident it’s not quite as dramatic as it once was when the tung oil was first applied. Even so, we’re extremely happy with how our wood floors have turned out, and we have no regrets in terms of our choice of wood species or the use of an oil finish.
Other posts by Eric Whetzel
- Completing the Wall Assembly
- Charred Cedar Siding
- Exterior Insulation and a Rainscreen
- The Blower Door Test
- Choosing and Installing a Ductless Minisplit
- Installing an ERV
- Choosing Windows
- Attic Insulation
- Installing an Airtight Attic Hatch
- Air Sealing the Exterior Sheathing
- Installing a Solar Electric System
- Prepping for a Basement Slab
- Building a Service Core
- Air Sealing the Attic Floor
- Ventilation Baffles
- Up on the Roof
- A Light Down Below
- Kneewalls, Subfloor and Exterior Walls
- Let the Framing Begin
- Details for an Insulated Foundation
- The Cedar Siding is Here — Let’s Burn It
- An Introduction to a New Passive House Project
Weekly Newsletter
Get building science and energy efficiency advice, plus special offers, in your inbox.


7 Comments
I did some work last year on a 3 season porch, adding insulation and sanding existing cedar boards. I used Penofin Verde as an alternative to finishes that might have VOC's. My customers and I really liked the look of the natural oil finish.
I didn't realize Penofin had a 'greener' version of their product.
The only other product we seriously considered using was the Rubio Monocoat.
They even have a version that can be used outdoors in a single coat:
https://www.rubiomonocoat.com/en/p/products/exterior/34-exterior-wood-care-protection-products-us/the-ultimate-all-around-product-for-all-your-exterior-wood/42-rubio-monocoat-hybrid-wood-protector?country=us
Eric,
Beautiful floors!
One thing that might be worth mentioning is seasoning the flooring before installation. There is a misapprehension that simply leaving the wood on site to acclimatize to the conditions in the house is sufficient. But in practice that only acclimatizes it to the ambient (elevated) humidity levels during construction, and at that time of year. It's best to estimate what the average humidity range in the house will be, and make sure the wood matches it. To establish this there are charts available online. This useful one came from Fine Homebuilding Magazine:
Thanks Malcolm! And thanks for posting the chart.
Excellent write up Eric, thank you sir. I’m curious about your comment about dogs. We’re considering Rubio Monocote and we do have large indoor/outdoor dogs. If anyone has experience with natural oil or hard wax finishes and dogs I’d love to know what experiences are.
Cory
Wood flooring is a fantastic idea, and its popularity is immense in the modern generation. Wood flooring is contemporary art its looks amazing. I like wood flooring and I found a good review https://bestbeltsander.org/makita/ on this page. Thanks for sharing your valuable ideas.
Hay mods! This is clearly spam, right?
Log in or create an account to post a comment.
Sign up Log in